Before you can sew your first toy, you need to learn the basic stitches. Even if your sewing machine will do majority of the work, these stitches you will need to know to make all details for your toys and to achieve professional look at the end:
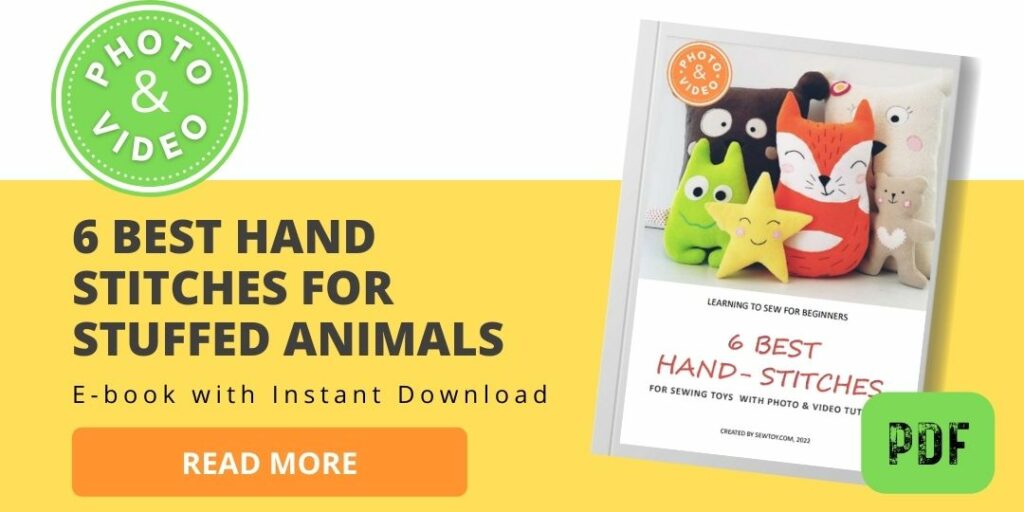
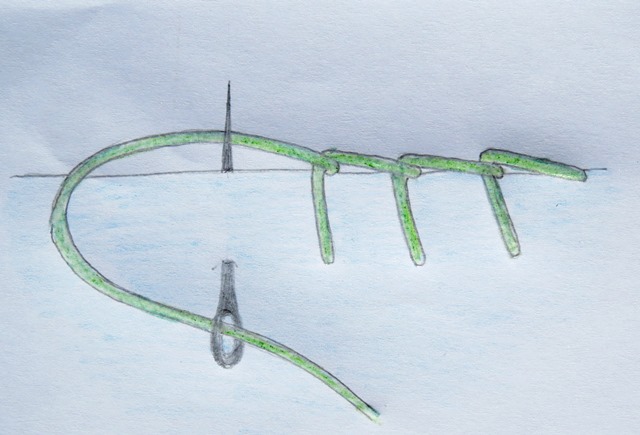
The running stitch – the basic stitch No. 1
This is the most basic stitch you will use majority of the time. It can be used for sewing layers together as well as for decorating.
The runing stitch
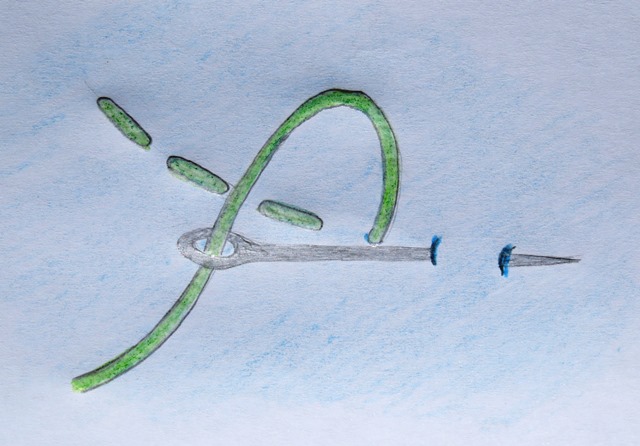
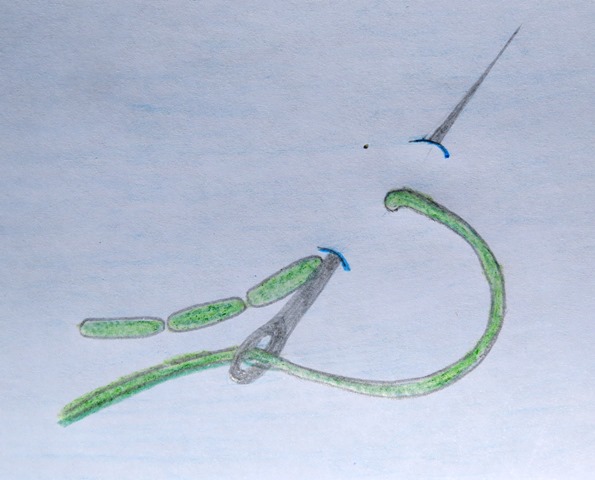
The ladder stitch – the basic stitch No. 2
The ladder stitch is similar to running stitch. You will use this one for closing up a hole from the outside or to attach features like arms, legs, head to the surface of a plushie. Available also: Detailed step-by-step photo tutorial for the ladder stitch
The ladder stitch
VIDEO & PHOTO TUTORIALS for all these absolutely the best 6 hand stitches for sewing stuffed animals and other toys are available as PDF e-book with instant download. Read more >>>
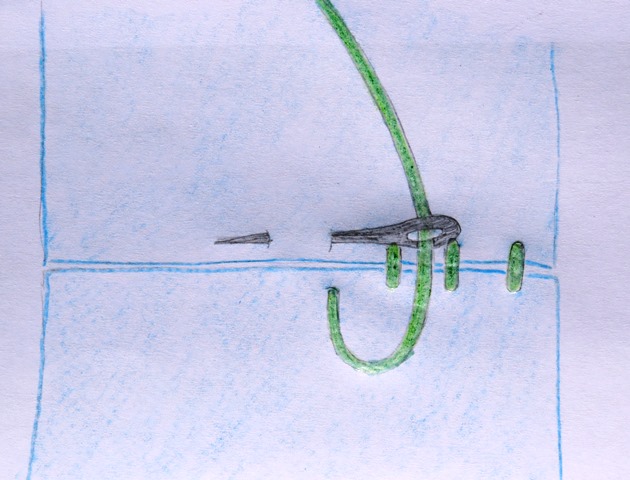
The whip stitch – the basic stitch No. 3
This is the stitch you’ll be using to attach details on top of another piece of fabric and for sewing together felt toys, especially when you will want seams to meet up flatly to create a shape. This is especially good for round shapes, like heads or bodies.
The whip stitch
The blanket stitch – the basic stitch No. 4
The blanket stitch you’ll use for decorating the edges of thick materials or for sewing thick materials like felt together. The stitch can emphasize the edges and give the plushy more professional look, especially if it is done in contrasting color.
The blancket stitch
The stem stitch – the basic stitch No. 5
This stitch you will use for decorating your toys like stitching the mouth on the cute plushy face.

The stem stitch
The back stitch – the basic stitch No. 6
This stitch will be used for decorative purposes, the same as the stem stitch. Although back stitch is more suitable for stitching smaller things, the final decision depends on the feel you wish to accomplish.
The back stitch
Don’t be afraid to play around with different stiches, see what works better in different situations, which you prefer to use. There are great tutorials on Youtube for all these stitches above, including my SewToy channel you are warmly invited to follow. Happy hand stitching!
Maja & SewToy friends
Check these cute & easy stuffed toy sewing projects!
They will make a perfect beginers projects for practising these seams!


12 Responses
[…] Close the opening using the leader stitch. […]
[…] sew the felt snout on using the running stitch […]
[…] Pin and then sew white felt circles on the black felt circle. Use very small stitches on the machine, to make it easier, or just hand-sew them using the running stitch. […]
Thank you
This really helps a loto
Yes, these are the best stitches to use when hand sewing an item you intend to turn inside out and work on further !
I really try try to support the sites that understand artists and their quirky tastes lol
[…] the toy for the little guys. Second, position the felt nose and sew it on the fabric using the running stitch. Thirdly, add the smiley mouth with black embroidery thread using the stem stitch. Last, sew the […]
Thanks I needed that because I freaking forgot how to stitch up my stuffed animal that I am making
Hi Greta, really happy to hear, it was helpful to you. Is it a Christmas surprise the toy that you are sewing?
I am very pleased with Bernie the Cat, and very anixous to make him, He is adorable, and will be the love \
of some ones life. All of the little softies are really so cute and just wanting a new home.
Hi Rutha, happy to hear that and looking forward to seeing, how he will turn out too. Happy sewing & creating!