 Sewing with smaller children can be challenging since they can’t do everything and there attention is limited. On the other hand children have such a vivid imagination. It is sometimes hard for us adults to comprehend this dimension, and to keep away from influencing it. Children often know exactly what they want and how they want it; expressing this is a bigger challenge for them.
I remember my youngest being frustrated from the earliest years on since he could not draw the same bear, giraffe, or owl as he had seen in the book we had read the night before. My explaining, that illustrators are professional adults, who needed a long time to be as good as they are now, didn’t help.
Sewing toys together, where he was the main creator, was a great way to release his imagination without comparing it and consequently limiting it with something already existing. How do we do it? What are my proven steps to memorable and enjoyable experience when sewing toys together?
1. Take time
First of all, you need enough time so that you won’t be rushed. When you are under the time pressure, you will tend to influence kid’s decisions to speed the process, and this is something you definitely don’t want. Relax, enjoy the whole process, I promise you will have a great time together, and you will learn something new from your child as well.
2. One is easier than two, or three, or …
If possible make this a special time for one kid at the time. Jumping from one kid’s idea to another, when all of them demand your attention, can be frustrating. You risk that kids’ attention will drop, and you will not complete anything at the end.
3. Ask the child
Invite the child, ask him, if he would like to bring his imaginary friend to life with you. This will help with the child’s focus and will put the importance to the project. Make sure wether he is in the right mood. If the reaction is “I will create my own plushy with my mommy, how cool is that!” you are for a good start. If he would rather run outside, it is better to postpone the project.
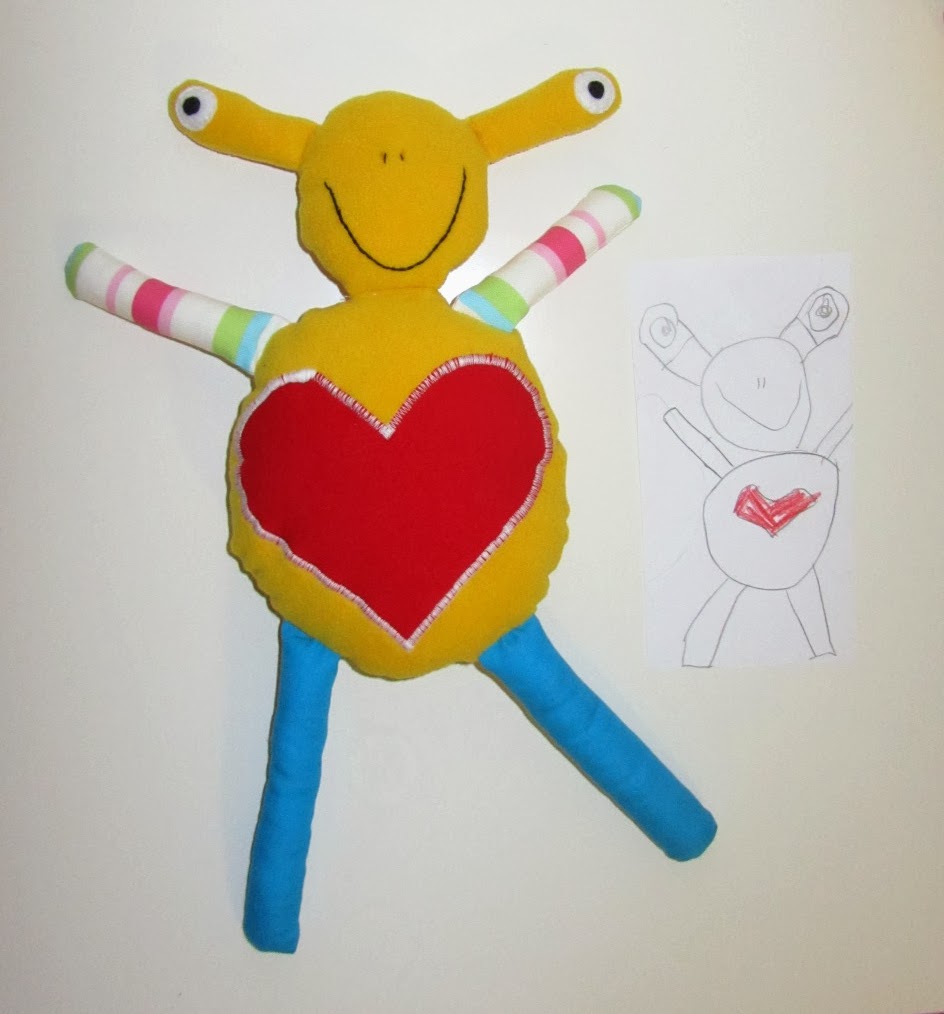
4. Start with a picture & chatting
Sit down together and let the child describe his imaginary friend to you while he is drawing it. You will learn a lot about his “friend” and consequently about your child as well; does his friend like to eat, is he afraid of dark, is he happy … He can color it, but it is not really necessary.
5. Make selection of fabric fun
This is where you can go through all of the fabrics you have. Let him to touch and feel different materials, explore how they combine. Are they soft, harsh? Which colors, patterns he likes? Take time at this point, don’t harry him, and try not to influence his decisions. You can educate him about the different materials, combinations, but really try not to take decisions instead of him. He knows how his imaginary friend looks and feels like, you don’t.
6. Drawing and cutting the pattern can be a puzzle making game
If the child is big enough he can cut the pattern by himself, otherwise you do it instead of him. If he can write already, he can write the appropriate names on the pieces: head, leg, tummy …
7. Transferring the pattern on to the fabric can be an art project by itself
Transferring the pattern on to the fabric can be fun and even the youngest can do it. How? Try my technique presented in the post TRANSFERRING PATTERNS TO THE FABRIC FOR SMALLER CHILDREN.
8. Involve small children in sewing; there is always something they can help you with
Sewing will primarily be your task if you are creating with smaller child, but this does not mean the children cannot participate in the process, which is quite magical for them since their imaginary friend begins to take the shape. Seeing the machine needle running up and down, trying the things the buttons on the machine do, is intriguing for kids. Involve them according to their capability. Small child may sit in you lab, push the paddle, or push the buttons on the machine. A litter bigger kid may already sew simpler things by himself. This part though needs to be fully supervised by you.
9. Fill the plushy with love and hidden powers
Filling can be done even by the smallest children; just leave the hole for filling bigger to make it easier for them, and make an extra push if needed at the end. While filling the plushy imagine you are filling it with love and hidden powers. If a child is afraid of dark, give a plushy a power of defending the child against ugly dreams.
10. Encourage the child to make finishing touches
You can add some extra touches at the end. Permanent fabric markers for drawing on light or dark fabric, that need no ironing, are the best for that. You can also use them in the phase of fabric selection where child can draw on that fabric his pattern, or picture, and you use this fabric for sewing.
When you are finished, take a picture for remembrance on this special time you two spent together.
Most importantly, do not forget to give your kid the biggest hug and a kiss, and praise him for a great work he had done.
These steps can be applied to other crafts project when you are creating with kids as well. It is all about the time you two spent together; it is about really listening to the child, and acknowledging his decisions without influencing them too much; it is about letting him to do by himself as much as he can and finally it is about creating environment for fun joyful learning.
I wish you all great, memorable sewing projects with kids. I would be happy to hear of your experiences and good practices as well.


No responses yet