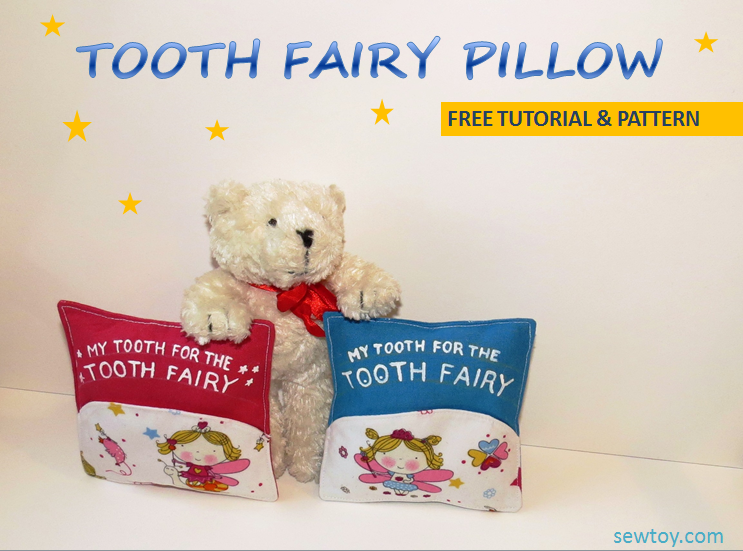
What is a tooth pillow and why in the world my kids would need one? I mean, seriously …
This was my firm belief until one night something happened.
How the Tooth fairy couldn’t find the tooth
My youngest, age 5 at the time, just lost his second tooth. If you have kids, you know how proud they are showing everyone their hole between remaining shiny white milk teeth. This is important to them, it is a sign everyone can see, and that they are not little kids anymore.
At the age of 5 majorities of kids still believe in fairytale creatures and they can’t wait for the morning to see if tooth fairy did bring them something for their milk tooth. So my son placed the tooth carefully under the pillow, anticipating fairy visit during the night.
The tooth fairy did visit him that night, being very silent, making sure, she will not wake him up. She carefully looked under the small soft cushion, but could not find the tooth. She went downstairs for a small light to have a better look. She looked everywhere, under the pillow, under the blanket, under the bed, trying not to wake him up, but still couldn’t find it.
In the end, the tooth fairy gave up, and she put some money for the tooth under the pillow, hoping, the child will not notice anything. In the morning, the child came down the stairs with money in one hand and tooth in the other (no idea where he found it) wondering, what went wrong, since the fairy left the tooth behind. And so mommy had some explaining to do.
Now I was convinced, that my boy and the fairy need some help, they need a tooth pillow.
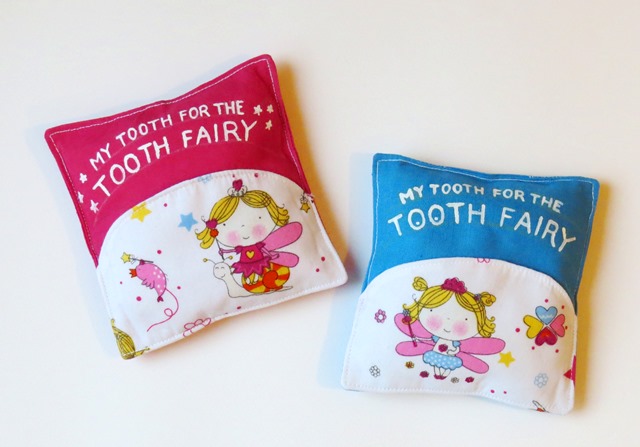
To prevent something like this happening again, and to make the job for tooth fairy easier, I have sewed a tooth pillow for my boy. He likes it very much, and we haven’t lost any tooth since.
How to sew a tooth pillow
Material you will need to sew a tooth pillow
- Small piece of colorful cotton: I found this super cute cotton fabric with little fairies on it that were just perfect
- Small piece of cotton for the inside of the tooth pocket
- Piece of cotton in a solid color that match the colorful piece.
- Filling
How to steps
Step 1
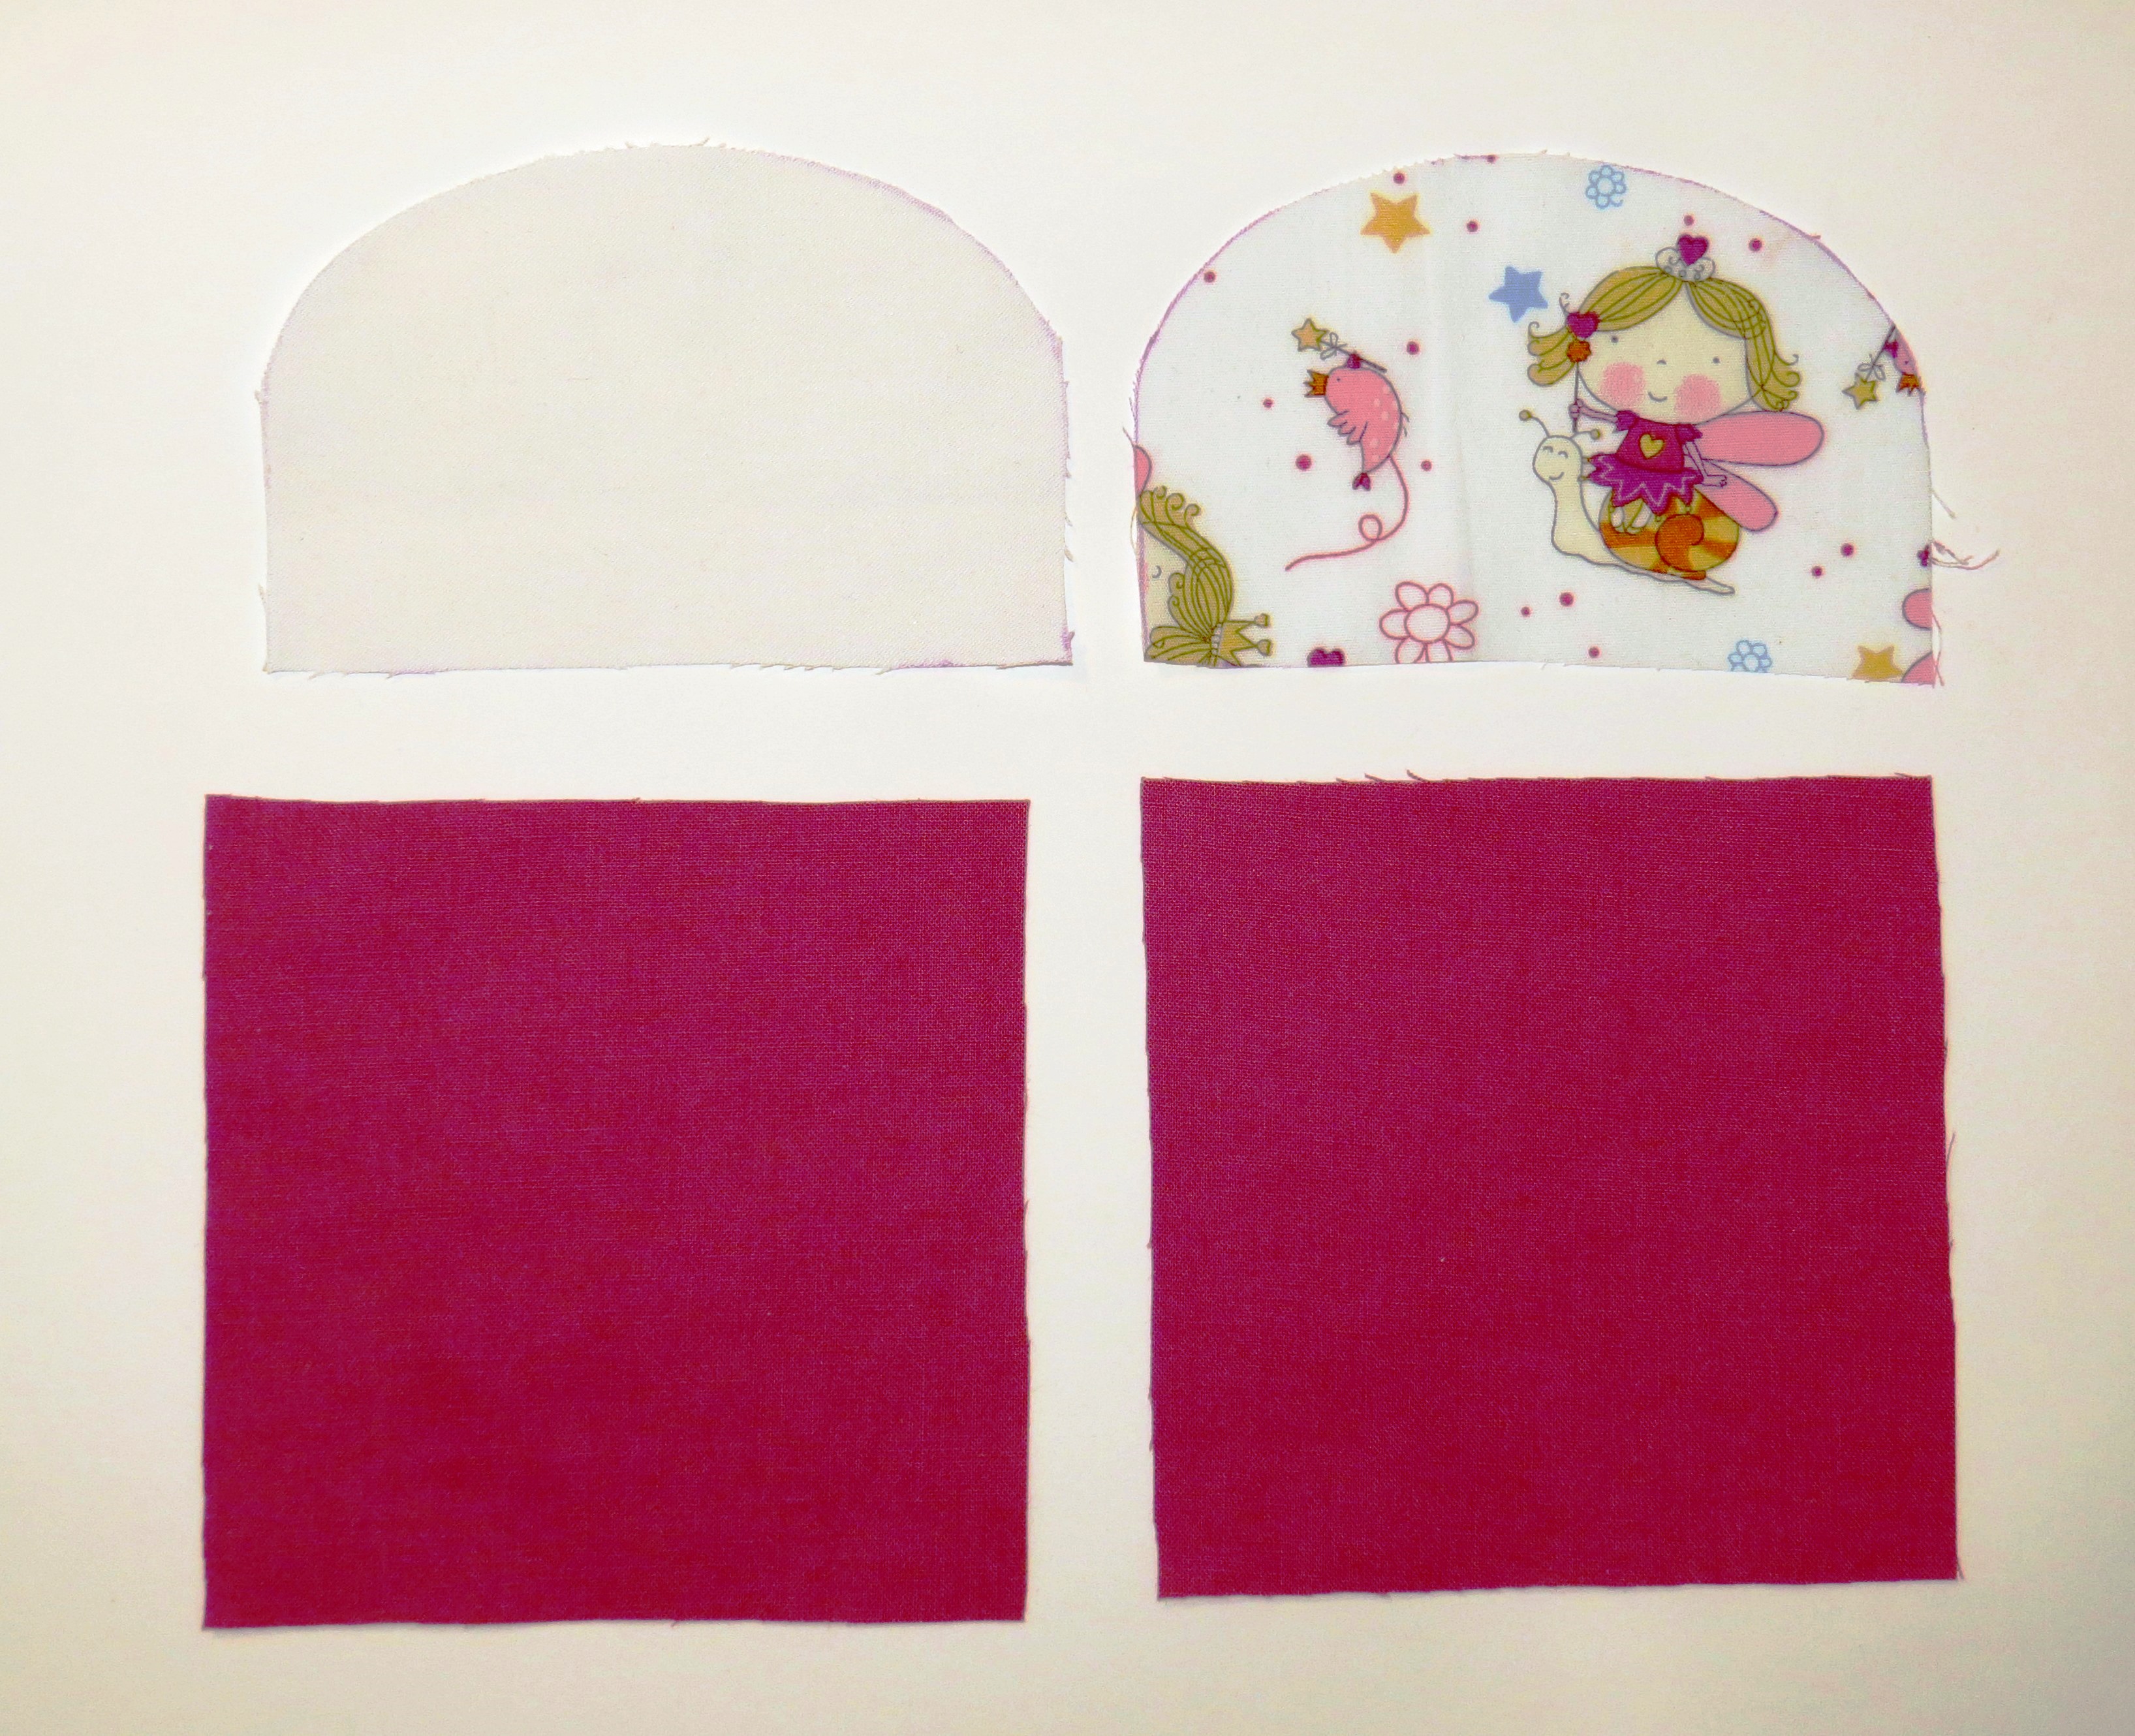
Print tooth pillow free pattern and cut out all the pieces you will need for a tooth pillow.
Step 2
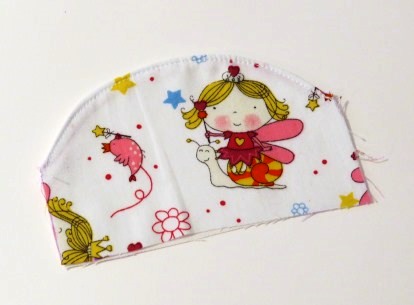
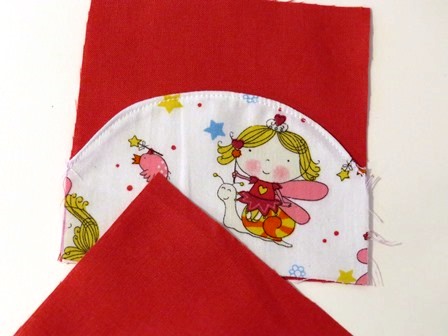
Put right sides of the both pieces of tooth pillow’s pockets together and sew on the curved top. Turn sewn pieces around, iron and sew the same edge from the other side.
Step 3
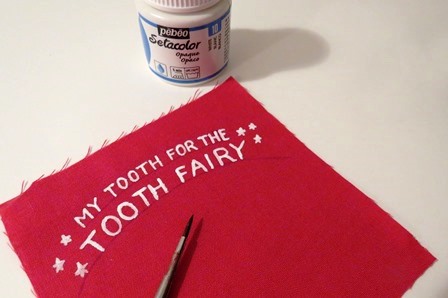
Add the words on the right side of the solid color piece. Write down the words I’ve used a trick marker that disappears after a while. Check the instruction if ironing to fix the color is needed. Instead of fabric color you can decide for embroidery too.
Step 4
Make a fabric sandwich: the solid color piece with the inscription right side up (the inscription on this picture is missing, if one was there, you would see it above the pocket), pocket piece right side up and solid color piece wrong side up. Pin and sew living a hole on the top of tooth pillow for the filling.
Step 5
Cut off the edges. Iron the opening, so that sewing afterward will be easier.
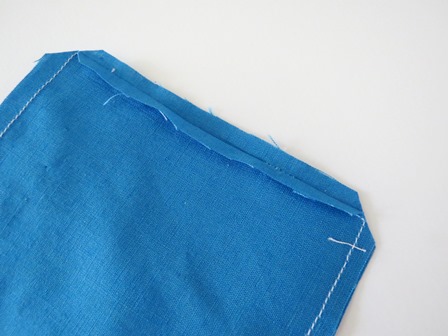
Step 6
Turn the tooth pillow around through the opening. Help yourself with something not too sharp to position the corners neatly. I’ve used a wrong side of a brush. Iron the pillow.

Step 7
Fill the tooth pillow with the filling. Sew all around the tooth pillow as close to the edge as possible, by doing that you will close the opening as well. And that’s it. Your tooth pillow is ready to use.
Do you know of any additional tips how to make this tutorial even more helpful? Feel free to use the comments section below to share your thoughts and ideas.
If you like this tutorial, please share it with your friends on Facebook, Pinterest and Google Plus.


No responses yet